Yeah, yeah, I know, I dropped off the face of the earth. Well, there was a good reason. I have been fighting the good chicken fight. I have been before our local city council several times already and I go back on July 8th to help craft a proposed ordinance amendment allowing chickens within the city limits of Mission. It will be voted on on July 15th.
In family news, we are giving up TV for a week to see how the kids do, if it remedies some of the crazies, we may chuck the set, we'll see.
Monday, June 29, 2009
Thursday, April 16, 2009
Clothes Dryer

I have wanted a clothesline for years, but the odd configuration of our yard, garden, and play equipment has been prohibitive to that. But I saw the Sunshine Clothes Dryer in the back of this month's issue of Mother Earth News. I did some research and found it rocks over other models. So I ordered one yesterday. The man was so nice. They are based out of Iowa. I wanted to pinch him he was so sweet. So now I anxiously anticipate the arrival of my new clothesline. And there was a coupon for cheap shipping in the ad. Yippie, you know I love that even more.
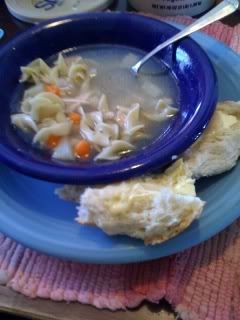
Mmmm, Chicken, two ways
... Or how to reuse chicken until you can't reuse it no more! These recipes use the same few vegetables, which allow you to stock up and make two complete dinners out of just a few things in your pantry and frig.
The other day Hy-Vee had whole chickens on sale for 99 cents a pound, so I bought two. Three days ago, I made roast chicken. There is no picture because we devoured it too quickly.
Neck and Gizzards: dinner for the pets or gravy -- your choice
Wash chicken completely. Remove neck and gizzards (usually found somewhere jammed inside the cavity). Place neck and gizzards into a small saucepan with a generous amount of water and a pinch of salt. Put lid on top and boil for about a half an hour. Remove heat and let cool completely. I typically pick the neck as clean as I can and feed the neck meat and gizzards to the dogs and cats or use it to make gravy. Save the broth for later.
Night 1: Roast chicken dinner
Use a large casserole dish or small roasting pan. Peel 2-3 potatoes and cut them into large chunks, throw into bottom of dish. Add some peeled carrots that you have cut into large pieces to the dish. Slice about 1/2 an onion into large chunks or rings and add the dish. Throw in a couple of diced cloves of garlic, a drizzle of olive oil, and a generous sprinkling of salt and pepper.
After chicken is washed, add a sliced lemon, 4-5 smashed garlic gloves (to open up and release the flavors), some rosemary (fresh is best, but dried can be used, as well), and about 1/4 of an onion cut into chunks to the cavity of the chicken. This will add flavor to your chicken as it roasts. I layer the ingredients until they are gone or the cavity is full. If you want, you can sew up the back of the chicken, but it's not necessary. Rub the chicken with olive oil and salt and pepper and place on top of the veggies in the casserole dish.
Place in preheated oven. Bake at 375 for about an hour and a half. If chicken is getting too crispy you can place some aluminum foil over it part of the way through.
Enjoy chicken and veggies. Save the juices and fat in the bottom of the pan, and whatever chicken is leftover. Put the casserole lid on (or some foil over it) and put it in the refrigerator over night.
Night 2: Chicken Noodle Soup
I am the queen of the crockpot, since I don't have to tend to anything. In the morning, add the following things to the crockpot:
Bake some yummy sourdough bread (see earlier post) if you have time during the day.
The other day Hy-Vee had whole chickens on sale for 99 cents a pound, so I bought two. Three days ago, I made roast chicken. There is no picture because we devoured it too quickly.
Neck and Gizzards: dinner for the pets or gravy -- your choice
Wash chicken completely. Remove neck and gizzards (usually found somewhere jammed inside the cavity). Place neck and gizzards into a small saucepan with a generous amount of water and a pinch of salt. Put lid on top and boil for about a half an hour. Remove heat and let cool completely. I typically pick the neck as clean as I can and feed the neck meat and gizzards to the dogs and cats or use it to make gravy. Save the broth for later.
Night 1: Roast chicken dinner
Use a large casserole dish or small roasting pan. Peel 2-3 potatoes and cut them into large chunks, throw into bottom of dish. Add some peeled carrots that you have cut into large pieces to the dish. Slice about 1/2 an onion into large chunks or rings and add the dish. Throw in a couple of diced cloves of garlic, a drizzle of olive oil, and a generous sprinkling of salt and pepper.
After chicken is washed, add a sliced lemon, 4-5 smashed garlic gloves (to open up and release the flavors), some rosemary (fresh is best, but dried can be used, as well), and about 1/4 of an onion cut into chunks to the cavity of the chicken. This will add flavor to your chicken as it roasts. I layer the ingredients until they are gone or the cavity is full. If you want, you can sew up the back of the chicken, but it's not necessary. Rub the chicken with olive oil and salt and pepper and place on top of the veggies in the casserole dish.
Place in preheated oven. Bake at 375 for about an hour and a half. If chicken is getting too crispy you can place some aluminum foil over it part of the way through.
Enjoy chicken and veggies. Save the juices and fat in the bottom of the pan, and whatever chicken is leftover. Put the casserole lid on (or some foil over it) and put it in the refrigerator over night.
Night 2: Chicken Noodle Soup
I am the queen of the crockpot, since I don't have to tend to anything. In the morning, add the following things to the crockpot:
- the broth from the gizzard and neck boiling
- pick the chicken carcass clean of any remaining meat, tear into pieces and throw into crockpot
- 1-2 potatoes, peeled and cubed into small pieces
- several carrots, peeled and sliced into small pieces
- the other 1/4 of the onion from yesterday, diced into small pieces (it will give the soup an amazing flavor)
- 3-4 cloves of garlic, diced into small pieces (it will give the soup an amazing flavor)
- now take a small holed colander and run whatever is in the bottom of your casserole dish through it. First you should get all the broth. Add it to the crockpot. Then run the more solid fat through by using a spoon to push it through. Add a little water and make it into broth. Add that to the crockpot.
- Now "wash out" the bowl you used for the fat with water. Add that to the soup.
- Add more water if necessary
- Salt and pepper to taste
- I like to also add basil and thyme
Bake some yummy sourdough bread (see earlier post) if you have time during the day.
About 45 minutes before you want to serve it, bowl some water, and turn off the heat on your crockpot. Boil a small bag of egg noodles in the water. Drain the noodles, run them under cold water to stop the cooking process, and add the noodles to the crock pot. Let them sit in the crockpot until ready to serve. Your soup will have cooled slightly, and will be ready to enjoy.
Oh, it is so good. My children devour it, and so do I.
Tuesday, April 14, 2009
Babies
I have babies... seedlings, that is, no more of the human kind for us, thank you very much, we are quite full up on those.
I am on my way to growing my own medicinal herbs. Both my calendula and my chickweed seeds from my medicinal gardening class on Saturday have already sprouted. I have had them on a heating pad in their little container and today I took them out to enjoy the first sun since Saturday and they quite happily sprouted while there. Here they are:


Inside on the heating pad.

I am on my way to growing my own medicinal herbs. Both my calendula and my chickweed seeds from my medicinal gardening class on Saturday have already sprouted. I have had them on a heating pad in their little container and today I took them out to enjoy the first sun since Saturday and they quite happily sprouted while there. Here they are:
The calendula babies

The chickweed babies (sorry it's blurry... they're really tiny)

Outside for the day

Inside on the heating pad.

Go, guys, go. We are taking advantage of the nice weather to get the planting boxes together tonight. So ready for nice weather, I cannot even tell you.
Saturday, April 11, 2009
Garden... Maybe
Well, yesterday was warm. Vibe us that we can get some raised gardening boxes built today in between kid soccer games and the medicinal gardening class that I am taking. It needs to stay warm and sunny today, so we can at least get them built, if not set down and filled.
I have decided for sure that I want to put the strawberry patch in the front yard. I think eventually I want to put a picket fence around the front yard so that if I do get chickens, sometimes I can let them out to peck around there. Plus, there is very little of anything else up there (including grass) because of our big beautiful trees, so why not. I could then plant some fruit bushes along the fence and have blackberries and raspberries. My one raspberry bush that I got last year for Mother's Day survived the long winter and hopefully will grow bigger this season.
My honeysuckle bushes, however, are not looking so good. I am not pulling them out, yet, but I'm just saying...
In chicken news... there is none. I have had no response to my e-mail. That means I will have to call on Monday and politely bitch and plead. Come on, people, I am so ready for my chickies! I promise they won't bother you.
My medicinal gardening class is at Badseed Farmer's Market in downtown KC. I took an Urban Homesteading class there a couple of weeks ago. I am really excited about the medicinal class and it's potential to steer what I plant in the herb garden this year.
Also, if anyone can get a hold of copies, there are great articles in both this month's edition of Mother Earth News and Ready Made on urban gardening and sustainability. We're taking over, folks.
Thursday, April 9, 2009
Yummy Food
Everyone should check out my friend, Tamara's new book. It will help you use some of the yummy produce that you find at your local farmer's market, or that you grow in your backyard.
Here's her site Your Body Awake!
Check it out and order her new book: Spring Pickin'.
Here's her site Your Body Awake!
Check it out and order her new book: Spring Pickin'.
Rain, rain go away!
At this rate I may not get a garden in until June. Lordy, lordy!
It's chilly and rainy today and the forecast is for more rain and more cold this weekend.
I would like to put in a plug for sunny warm weather on a weekend so I can actually complete the beds and get stuff in.
I think I have decided to add another large bed to the front yard to have a permanent strawberry patch. I am excited about that. I am not sure my yard Nazi neighbors will be, but they need to learn to embrace the natural side of life, frankly.
Wednesday, April 8, 2009
Taco Seasoning

We like Mexican food at our house. A lot. Looking at our bellies, possibly too much... but that is for another post. Anyway, the pre-packaged taco seasoning is chocked full of all kinds of things I can't pronounce and that I'm pretty sure I don't want to ingest, so I make my own. This is how I do it. BTW, the amounts listed are close approximations. Here at Chez Jerritt I do not do a lot of measuring in my cooking unless I am baking something very sensitive.
Taco Seasoning
To 1 - 1 1/2 pounds of browned ground hamburger, ground turkey, or veggie crumbles add:
 And, yes, I know all fresh, homegrown, or even bulk would be better than some pre-packaged spices, but like you I am working towards self-sufficiency... and it is a process, so bear with me.
- 1/2 - 2/3 cup of water
- 2 T chili powder
- 2-3 cloves of garlic (I really like garlic, so I have a heavy hand, judge accordingly for yours)
- 1 1/2 tsp paprika
- 1/2 tsp salt
- 1 tsp cumin
- heavy pinch of pepper
- some red pepper flakes or ground cayenne (or a pepper cut up if you have one -- I have to tread carefully here, as I love spicy things, but my kids not so much)
- 1/2 an onion or 3-4 green onions or a small handful of chives (I have some in my yard now so today mine are yummy and fresh!)

Let it heat through and enjoy. My kids love nothing more for dinner (well, maybe pizza, but...) than make your own taco night.
Homemade Cleaning Products
Cleaning products are another area where you can make major changes that will drastically reduce both your ecological footprint, and the money you spend for your home.
If you remember nothing else, remember this, having a large bottle of white vinegar in your home at all times is essential. It also helps to have a couple of spray bottles on hand. You can reuse bottles, but I would only do so if they initially contained something non-toxic. For example, I have reused two old Method cleaner bottles for all purpose cleaner, but I would not reuse a cleaning bottle that had had caustic chemicals in it. It's very hard to get all of that out of the bottle and know it's going to be safe for your family. Otherwise, I would suggest checking your grocery store or garden supply store for empty spray bottles. Typically I can find them for less than a couple dollars a piece.

All Purpose Cleaner
Fill bottle
Glass Cleaner
Fill bottle

Mold & Mildew Killer
Fill bottle with:
For Scrubbing
When you need something abrasive for scrubbing you can use an oxygen-based cleaner (like an Oxy Clean, etc), just try and make sure it does not have any chlorine bleach added to it. You can also use straight baking soda. Either of these can be applied, slightly damp, allowed to sit and then scrubbed hard into the surface. They will dry out and get nice and hard and able to scrub very good.
Later I will share with you my favorite laundry detergent recipe, but that is for another post.
Enjoy cleaning!
If you remember nothing else, remember this, having a large bottle of white vinegar in your home at all times is essential. It also helps to have a couple of spray bottles on hand. You can reuse bottles, but I would only do so if they initially contained something non-toxic. For example, I have reused two old Method cleaner bottles for all purpose cleaner, but I would not reuse a cleaning bottle that had had caustic chemicals in it. It's very hard to get all of that out of the bottle and know it's going to be safe for your family. Otherwise, I would suggest checking your grocery store or garden supply store for empty spray bottles. Typically I can find them for less than a couple dollars a piece.

All Purpose Cleaner
Fill bottle
- 1/3 full of white vinegar
- 2/3 full of warm water
- 8-10 drops of your choice of essential oil
Glass Cleaner
Fill bottle
- 1/3 full of white vinegar
- 2/3 full of warm water

Mold & Mildew Killer
Fill bottle with:
- 4-5 cups of warm water
- 2 tsp of tea tree oil
- 8-10 drops of essential oil (optional)
For Scrubbing
When you need something abrasive for scrubbing you can use an oxygen-based cleaner (like an Oxy Clean, etc), just try and make sure it does not have any chlorine bleach added to it. You can also use straight baking soda. Either of these can be applied, slightly damp, allowed to sit and then scrubbed hard into the surface. They will dry out and get nice and hard and able to scrub very good.
Later I will share with you my favorite laundry detergent recipe, but that is for another post.
Enjoy cleaning!
Of Honesysuckle and Snow

Saturday night there was a freecycle advertisement for large honeysuckle bushes that someone had pulled from their yard. I love honeysuckle and have been wanting it for the back fence. The house was near us, so we decided to go Sunday morning and get at least a couple. Sunday it snowed. Adam and I went, in the snow, and strapped two large honeysuckle bushes to the roof of the minivan. We brought them home, covered them with sheets, poured some warm water on the roots and hoped for the best. It took until Tuesday evening for it to warm up enough for us to get them in the ground. Last night we planted them. They look pretty peaked. Hopefully they will make it. It's supposed to be warm later today. I am not holding my breath, but I figure if they don't make it, the worst we're out is a trip in the snow to get them. So think happy thoughts for my honeysuckle, please.

Tuesday, April 7, 2009
Tea Tree Oil Strikes Again
See, I told you it was useful. I just used a capful of it in the bathtub to de-stink the children who ran through fresh dog poop in the backyard. "Hey, kids, when it's wet and it's been cold and mama hasn't had the time or the weather to clean up the dog poop in the backyard, you would do well to listen to her when she says, 'watch out for the dog poop!'" Yuck. But it did the trick!
Thanks for all the additional tea tree oil uses in the comments before. I love knowing what you guys are doing with it.
Thanks for all the additional tea tree oil uses in the comments before. I love knowing what you guys are doing with it.
I Made Granola Today!

Mmmm, it's yummy. The kids devoured it warm out of the oven.
My recipe is adapted from both the Make it From Scratch and Little Birdie Secrets recipes.
Homemade Granola
6 cups of old-fashioned oats
1 cup of wheat germ
4 T flax seed meal
1 cup flour
3/4 cup brown sugar
3/4 cup vegetable oil
3/4 cup honey
1/4 cup water
2 T vanilla
1 T salt
1/8 cup cinnamon
2/3 cup chopped almonds
1 cup craisins or raisins
Mix all ingredients. I like to use a turkey roaster lightly greased, as I can stir it up really well without it flying out. I mix it and cook it all in the same pan. Bake at 325 degrees for 20 minutes. Remove from the oven and stir well. Bake for another 15 minutes. Remove from the oven and immediately scrape the pan to prevent it from sticking. When it's completely cool you can put it in a jar. I store mine in an empty oat container (it's about the right size, and I often have a spare one after I make the granola). Try some warm, though, before you put it away, it is SO good.

Learn to Freecycle

I'm not sure how much I can stress the beauty that is freecycle. Our family would live a much less comfortable lifestyle without freecycle. If you are not familiar with it, freecycle is an online swap board. There is one for most major and even moderately-sized cities. Everything offered is free, you generally just have to be willing to go haul it. You can also offer things on freecycle, as an easy way to get rid of stuff you don't want or need without either hauling them away or having them clutter up the landfills. It is awesome, both in it's ability to keep things out of the waste stream, and in providing those of us who are trying to live in a more green and thrifty manner a better quality of life. Everything you reuse or obtain used is automatically a "green" good.
This is freecycle's official site. You can find the group closest to you, and sign up for their listserv.
How freecycle works:
- an individual will list an item on freecycle
- the listing will look something like this (depending on your area): OFFER: water heater: Kansas City
- if you need a water heater, you click on the e-mail.
- The body of the e-mail will generally tell you more about what is offered. For example, 40-gallon water heater, in working condition, just removed from our home when we upgraded for a newer model.
- The e-mail will also sometimes list conditions that you must meet to be eligible for this item. For example, must be able to pick up today, must be the first to respond, or need to be able to bring your own truck.
- If you are interested and meet the conditions, then you e-mail the person directly by replying to the e-mail.
- The poster will e-mail you if you "won" the item, and let you know when and where to pick it up.
- You can get individual e-mails from your freecycle organization. This will vastly clutter up your e-mail inbox. However, if you are willing to put in place e-mail filters, or just deal with the extra clutter, you will have a much better chance of "winning" some of the freecycle items that often get grabbed up quickly. This method works especially well if you are home or near your computer frequently during the day. This is what I do.
- You can get a daily digest of all of the offerings of the day. This will ensure you get much less e-mail. However, you may be too late too receive consideration on a lot of the items.
- You can check your local freecycle site directly. You will not receive any e-mails, but you will have to check the site frequently to be able to have any chance of receiving any items.
I have heard that in some larger cities, like New York, it can be difficult to get things. But don't despair, keep trying. It will happen. And you will be glad you got involved. Take the time and get involved in freecycle, you will not regret it.
Monday, April 6, 2009
Making your own Sourdough Bread
Probably one of the easiest ways to make a small change in how your family eats, if you like to bake, is to make your own bread. Whether you make all of your bread, or just an occasional loaf with soup, it makes a difference in your food bill and your foot print. My family loves sourdough bread. For sourdough you will need a
Sourdough starter:


Sourdough starter:
- 1 (.25 ounce) package or 2 1/4 tsp active dry yeast
- 2 cups warm water
- 2 cups all-purpose flour


Mmmmm, fermented goodness!
Then, once your starter is all ripe and stinky (yum!), you can make sourdough.
Sourdough Bread:
Then you oil the bowl with a bit of olive oil, and let it rise in a warm spot under a towel for about an hour (or you remember to check on it).

Then you want to roll the dough into two fat footballs, and make a few shallow cuts across the top to let the air out when baking. I use a slightly damp bread knife to do this easily.

Cover them again and let them rise for another hour or so.
Paint them with the egg wash from above. Beat the egg, add some water, and then lightly brush the wash over the bread with a pastry brush.


Bake in a pre-heated oven on a lightly greased baking sheet for 30 minutes at 375 degrees. Cool on wire racks, but not too much. It is best enjoyed warm, slathered in butter or margarine. Mmmmmm.
 TOTALLY worth the effort. I promise you! Your family will consider you a rock star.
Then, once your starter is all ripe and stinky (yum!), you can make sourdough.
Sourdough Bread:
- 4 3/4 cups bread flour
- 3 tablespoons white sugar
- 2 1/2 teaspoons salt
- 1 (.25 ounce) package or 2 1/4 tsp active dry yeast
- 1 cup warm milk (can sub soy milk -- we do)
- 2 tablespoons margarine, softened
- 1 1/2 cups sourdough starter
wash for just before baking - 1 large egg
- 1 tablespoon water
Then you oil the bowl with a bit of olive oil, and let it rise in a warm spot under a towel for about an hour (or you remember to check on it).

Then you want to roll the dough into two fat footballs, and make a few shallow cuts across the top to let the air out when baking. I use a slightly damp bread knife to do this easily.

Cover them again and let them rise for another hour or so.
Paint them with the egg wash from above. Beat the egg, add some water, and then lightly brush the wash over the bread with a pastry brush.


Bake in a pre-heated oven on a lightly greased baking sheet for 30 minutes at 375 degrees. Cool on wire racks, but not too much. It is best enjoyed warm, slathered in butter or margarine. Mmmmmm.
 TOTALLY worth the effort. I promise you! Your family will consider you a rock star.
Here Chicky, Chicky
Our city is SO behind the times. They have a ban on all non-domesticated animals, including chickens. This is distressing to me, as I desperately want some laying hens. Adam is luke warm on chickens, but so sick of hearing me pine about them, that he is willing to work towards them, as well. So today, I was proactive and sent an e-mail to our mayor. I know of at least two other families in our city who are interested in housing urban chickens, so I threw that in for good measure.
The e-mail:
I am writing for myself and several other citizens of Mission who are interested in furthering Mission's commitment to green living. We have taken on the challenge to move towards more sustainable living. As part of that we have planted gardens, recycled, used rain barrels and composted. However, we asking for a change in a city ordinance to continue in another area. I would like, as would several other people I know, to raise a few chickens so that we can have our own fresh eggs. They would also further natural pest control and fertilizing. Many other cities around us, including Merriam, Shawnee, and Kansas City, Missouri, now allow their citizens to keep a small number of "urban chickens" for their own use. We would be good animal stewards, will build coops and runs, will care for our chickens, and even agree not to house any roosters to lessen the noise of keeping such animals. The following is a website with more information, if you are interested: http://urbanchickens.org/. I am open to as much dialogue as is necessary to bring a change in our animal control ordinance to allow for the keeping of a small amount (say 4-5) laying hens for personal usage. Thank you for your time. Sincerely, Jerritt Dayhoff
Now, cross your fingers and look for regular updates on my drive to change the city ordinance.
Lesson 1: Tea Tree Oil is Your Friend
Okay, so if there is one thing that I have learned over the past couple of years is that tea tree oil is the crunchy household's best friend. You can do almost anything with it. I have even learned to love the smell. It took me awhile.
So, jerritt, you ask, what can you do with tea tree oil? Well, I am glad that you asked.
1) It makes the best zit killer ever. Dab it on the spot for ones that are already there. Use a drop or two on a wet wash cloth or kleenex for an all over daily astringent.
2) It kills everything. I keep a spray bottle mixed up with 4 cups of water and a couple teaspoonfuls of tea tree oil at all times. It kills mold. It makes the smell of even stinky diaper pails and places where dogs have pooped inside (I know these two from experience, in particular) go away. Spry it in the shower to kill mildew. Spray it in buckets where you keep wet rags to kill mold and mildew.
3) Put a few drops in a face scrub, (Ivory's is the best! The recipe is here) to keep it from going bad before it's time.
4) If rubbed in the hair, it helps to kill and prevent lice. Unfortunately, this one is from experience, too. Darn kids.
5) You don't have to be scared of it like you do so much of the "health and beauty" stuff out there.
6) The possibilities are endless. You can get a super good deal online on a huge bottle of it. I know because I just ordered it. And shipping is cheap. Yeah, online shopping. Check out Vitacost.
In the health food stores, 1.2 an ounce can run you $11, so shop wisely.
Drop me a line here in the comments, and let me know you're favorite use for tea tree oil, I'd love to expand my love affair with this essential oil.
Welcome

This is an undertaking for me. I have decided, along with my husband and 4 kids, that we are going to work towards a more sustainable form of living. Some of us our embracing it more than others. My older daughter, the Hannah Montana addict, will likely not be giving up her Radio Disney, but you know, we are, after all, dropping out... a little.
Over the past several years we have been making modifications to our home and way of life to work towards a more sustainable future, and to make our lives more green. This website is one more step for me. It is me making a firm commitment to continue living as green as possible and to work each week towards adding something new to my repertoire.
We are not going completely back to nature. We will never give up the computer or the dishwasher, and I am firmly entrenched in my love of Diet Dr. Pepper, but we have made major steps toward eating more locally, conserving, and growing and making more of what we use.
I grew up on a farm. We raised sheep, cattle, and some crops. Adam (my husband) grew up the son of a grain elevator owner, so he too spent a lot of his early years attached to the land in some way. Now we live in the suburbs 10 minutes outside of Kansas City. Adam works downtown as a civil engineer, and I am a stay-at-home mom, having left my job as an attorney for the public defender's office to raise our family and manage our home full-time. It is an adventure, to say the least. Thanks for joining us on the journey.
Subscribe to:
Posts (Atom)
